Cloud Virtual Devices


You can view, manage and access your Genymotion SaaS Cloud instances from Genymotion launcher.
In the Devices section, navigate to the CLOUD tab:
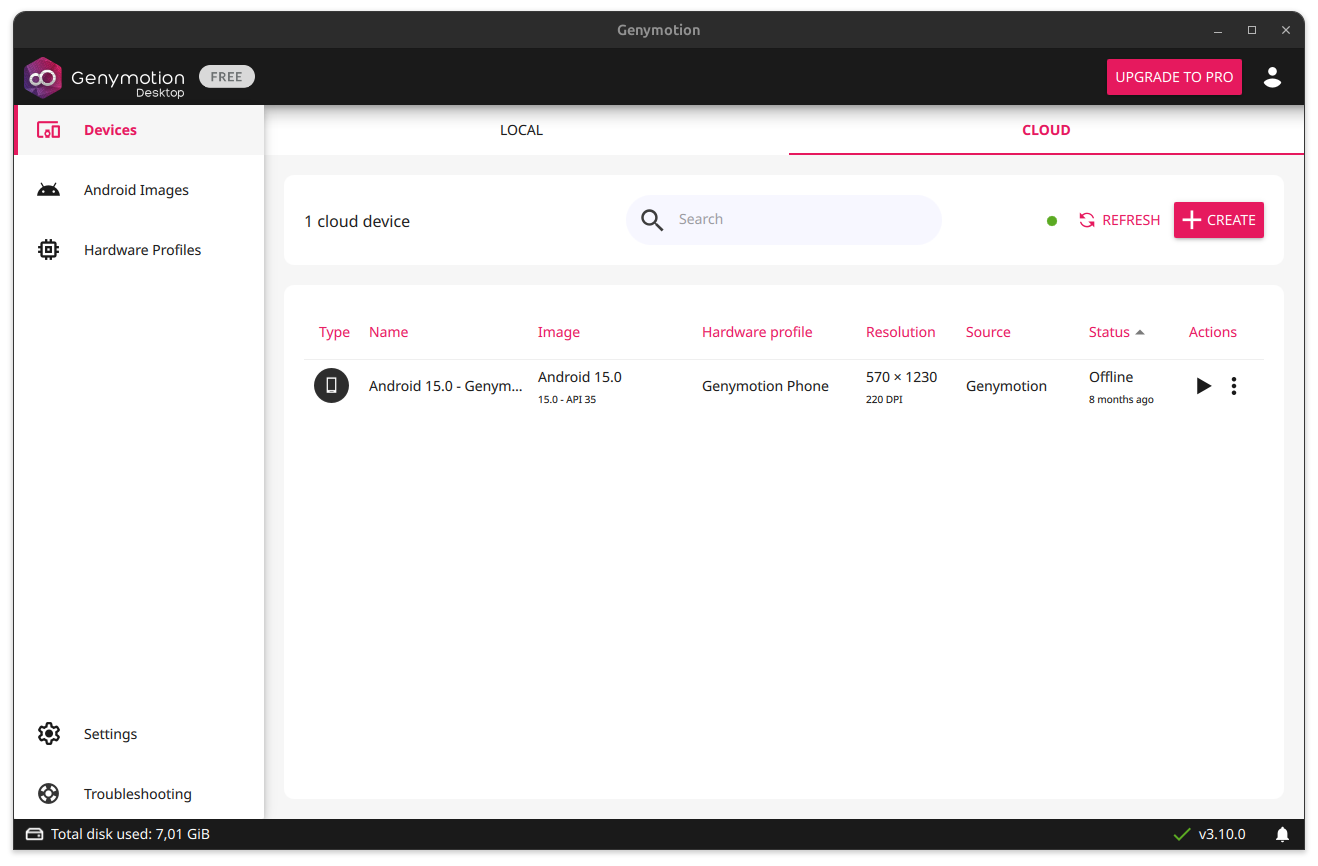
This tab lists your Genymotion SaaS devices. Devices that are not running can be started, and running devices can be viewed, stopped, etc.
If you are not connected to Genymotion SaaS yet, before interacting with devices you will be prompted to log in or create an account. Refer to the Genymotion SaaS quickstart guide if you need to create one.
Click REFRESH to refresh the list of devices.
For Genymotion SaaS users
The Cloud tab in Genymotion Desktop presents SaaS recipes and instances together as devices. Recipes appear as stopped devices, and running instances appear as online devices.
Create a new cloud device
Click CREATE to open the Cloud device creation wizard:
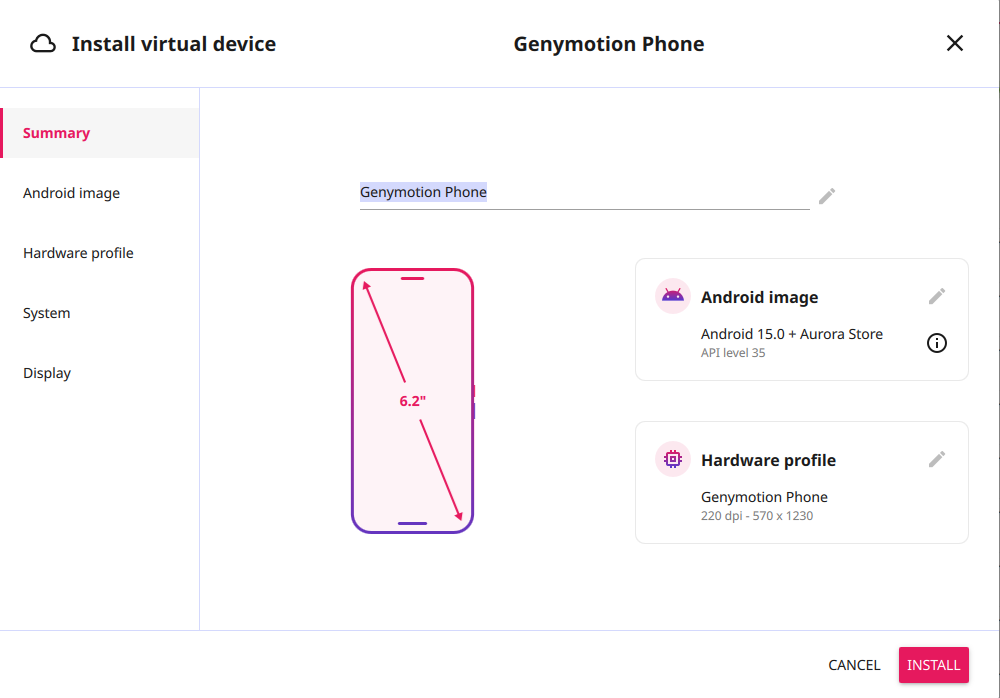
You can then create the device with the default configuration, or navigate to the tabs to customize the device configuration before creating it.
Android image
Navigate to the Android image tab to select the Android image for your new cloud device. You can also search for a specific image using the search bar:
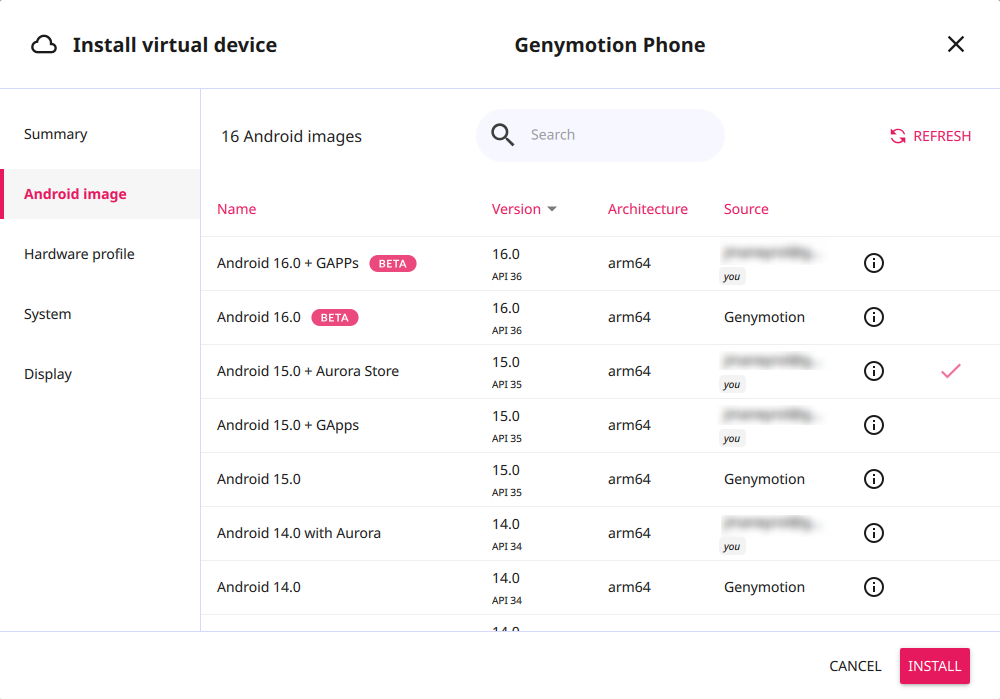
Custom/Saved images will also appear in the list, if you have already created them in Genymotion SaaS.
Hardware profile
Navigate to the Hardware profile tab to select the hardware profile for your new cloud device. You can also search for a specific hardware profile using the search bar:
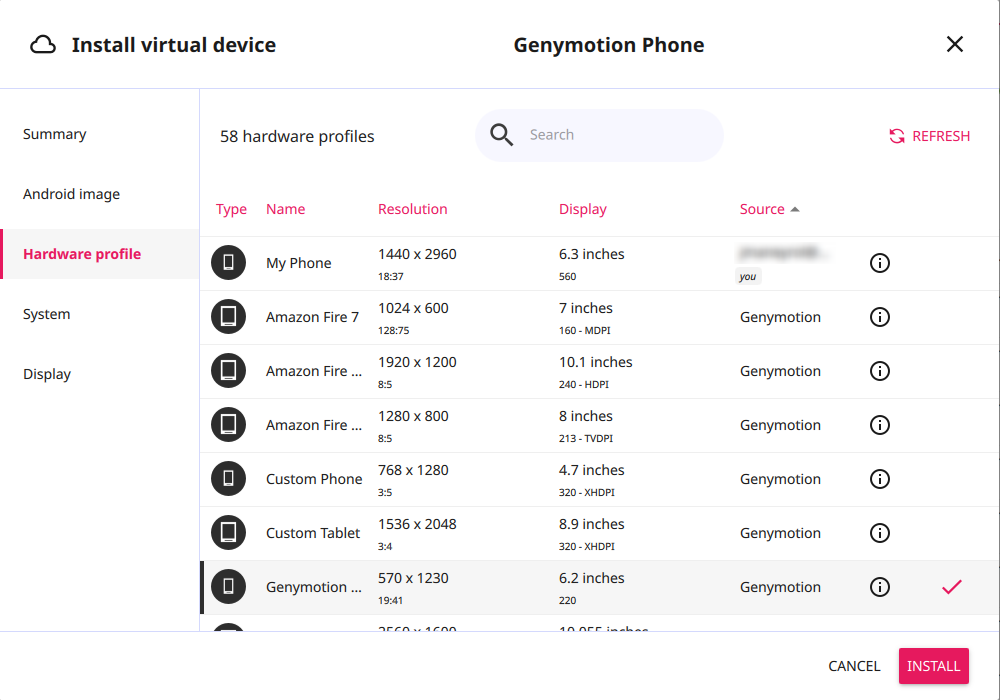
Custom/Saved hardware profiles will also appear in the list, if you have already created them in Genymotion SaaS.
System
Navigate to the System tab to select the system configuration for your new cloud device:
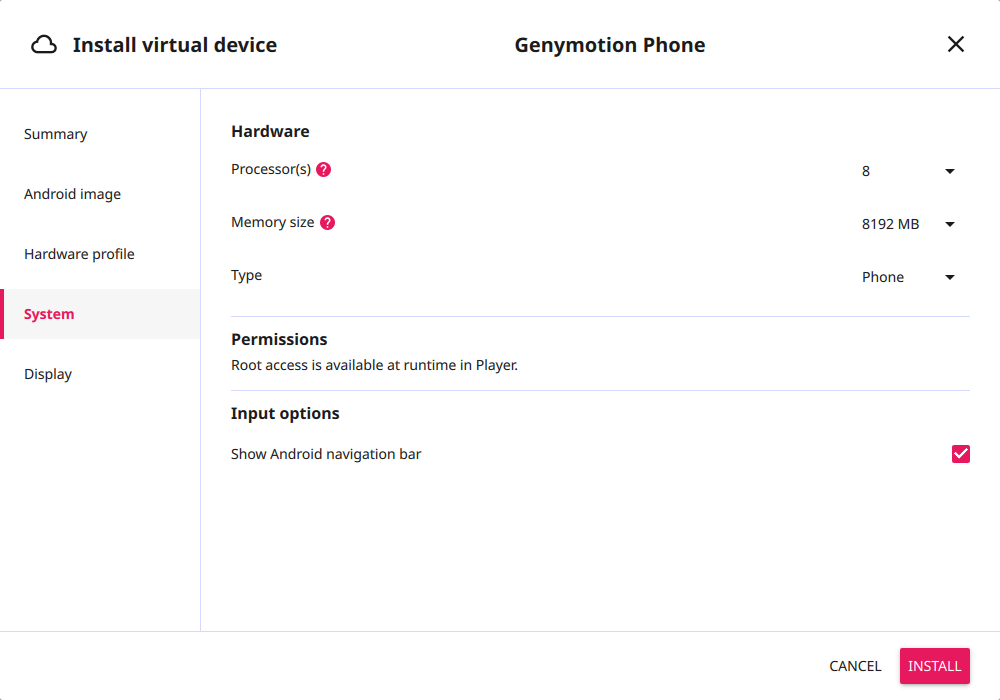
You can configure the following system settings:
- Processor(s): number of virtual processors to allocate to the device.
- Memory size: amount of RAM to allocate to the device.
- Type: type of device to create, either a phone, a tablet, a watch, a TV, or an Automotive device.
- Permissions: this option is only available at runtime. To toggle root access on the Cloud device, please refer to Root access feature.
- Show Android navigation bar: check this option to show the Android navigation bar in the device display, or uncheck it to hide it.
Display
Navigate to the Display tab to select the display configuration for your new cloud device:
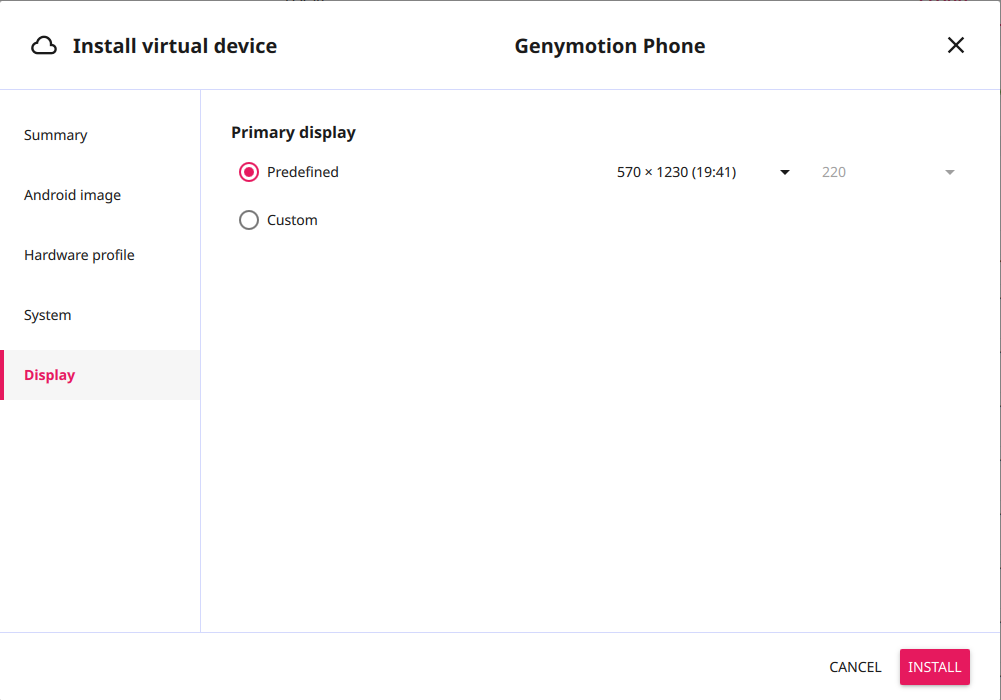
You can configure the following display settings:
- Predefined: select a predefined display resolution from the list.
- Custom: select a custom display resolution by entering the width and height in pixels. Please note that setting a custom resolution may cause display issues.
When done, click INSTALL to create your newly created device(s). Note that if the hardware profile you selected is read-only, you will be prompted to create a copy of before proceeding.
Your newly created device(s) will appear in the list of devices, and you can start them as described in the next section:
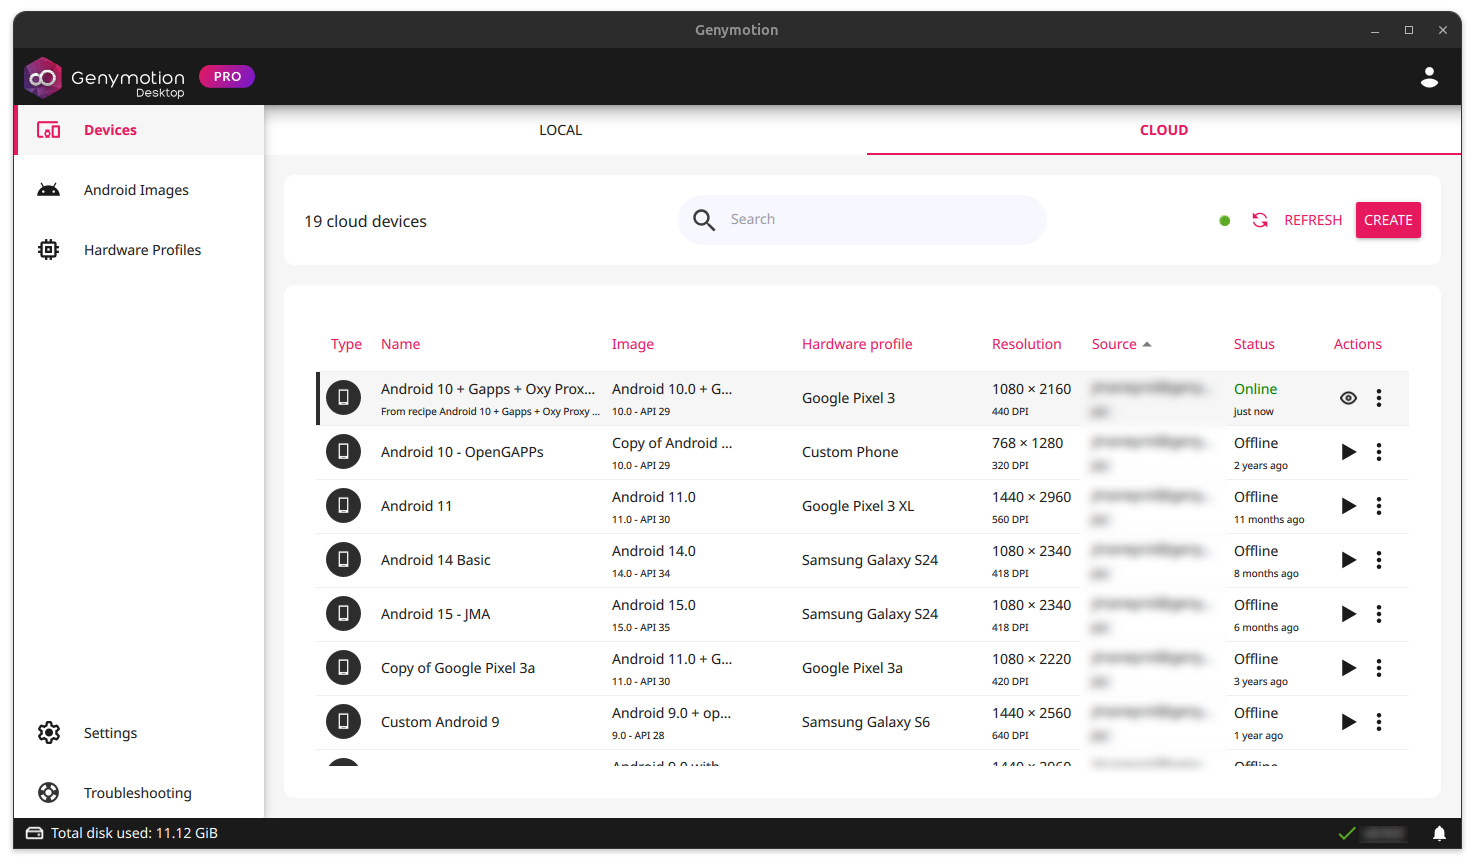
Cloud devices created in Genymotion Desktop will appear in Genymotion SaaS as custom recipes.
Start a cloud device
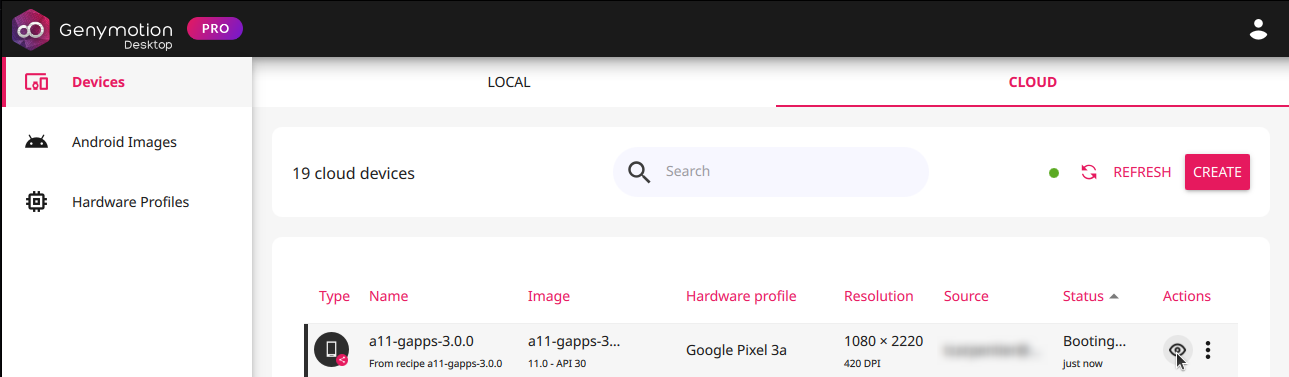
Simply double-click, click , or > "Start instance", next to the device you wish to start. When ready, the device will appear "Online" in the dashboard:
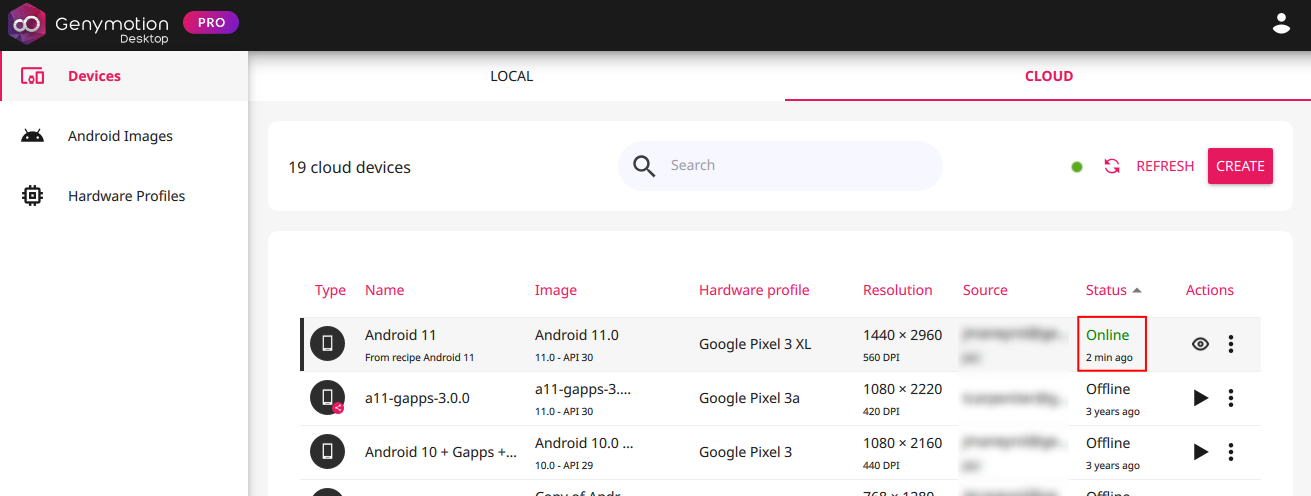
For Genymotion SaaS users
This corresponds to creating a new instance from the recipe in Genymotion SaaS.
Open a cloud device through Genymotion Desktop

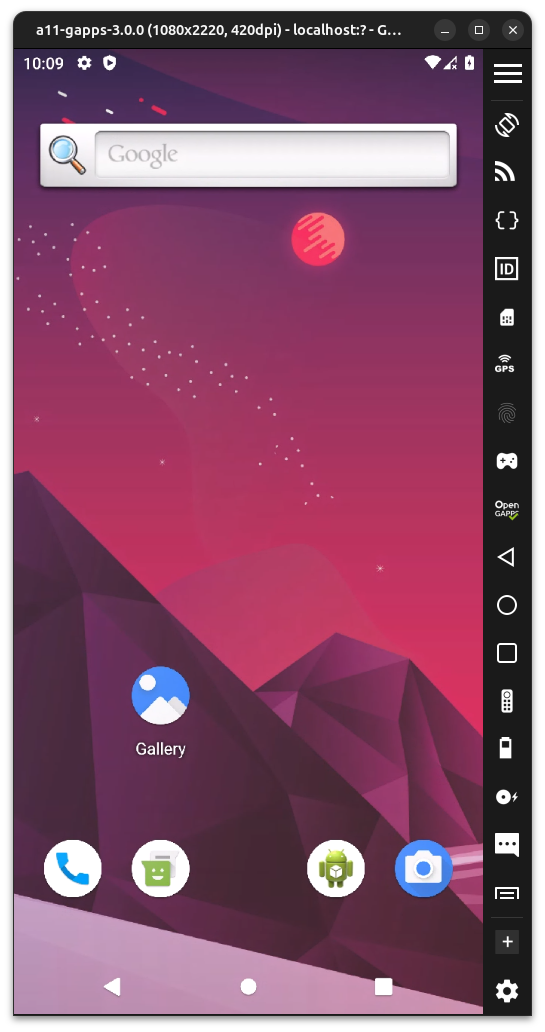
Once your device is online, click to open its display in Genymotion Desktop:
You can then operate your cloud device like a local virtual device:
Edit a cloud device
You can change the configuration of a cloud device by clicking > "Edit" next to the device you wish to edit.
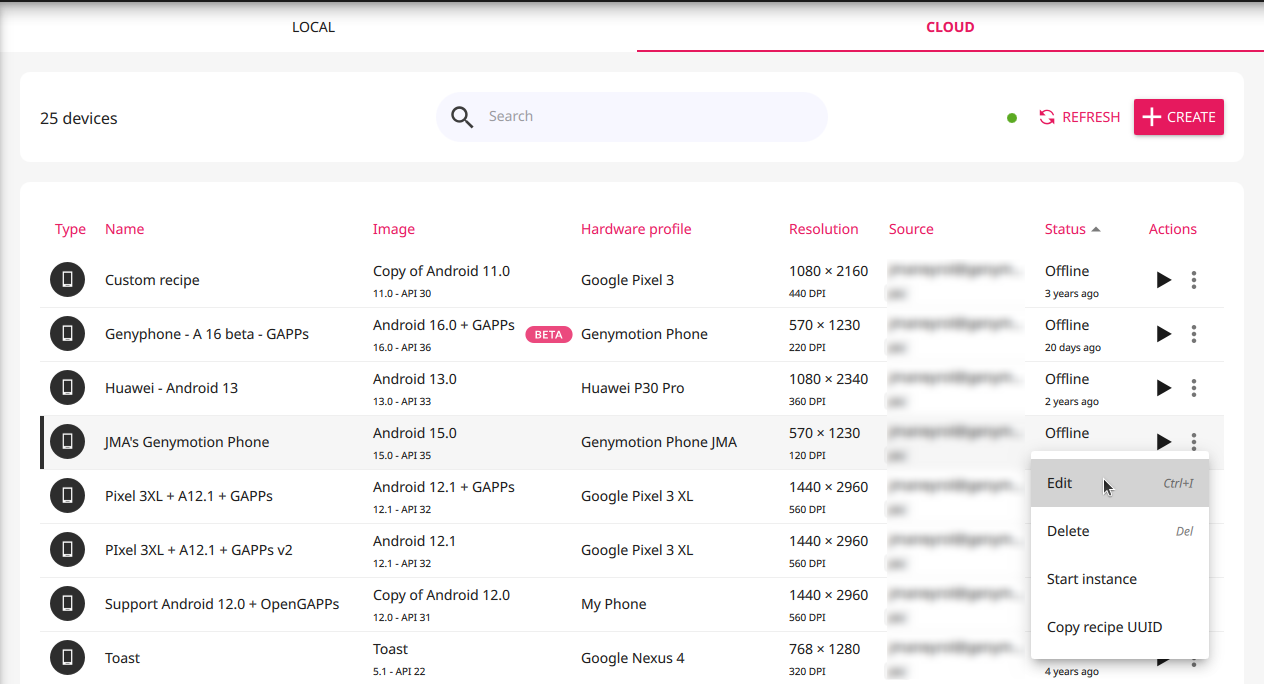
This will open the same wizard as when creating a new device, with the current configuration pre-filled.
Delete a cloud device
You can delete a cloud device by clicking > "Delete" next to the device you wish to delete.
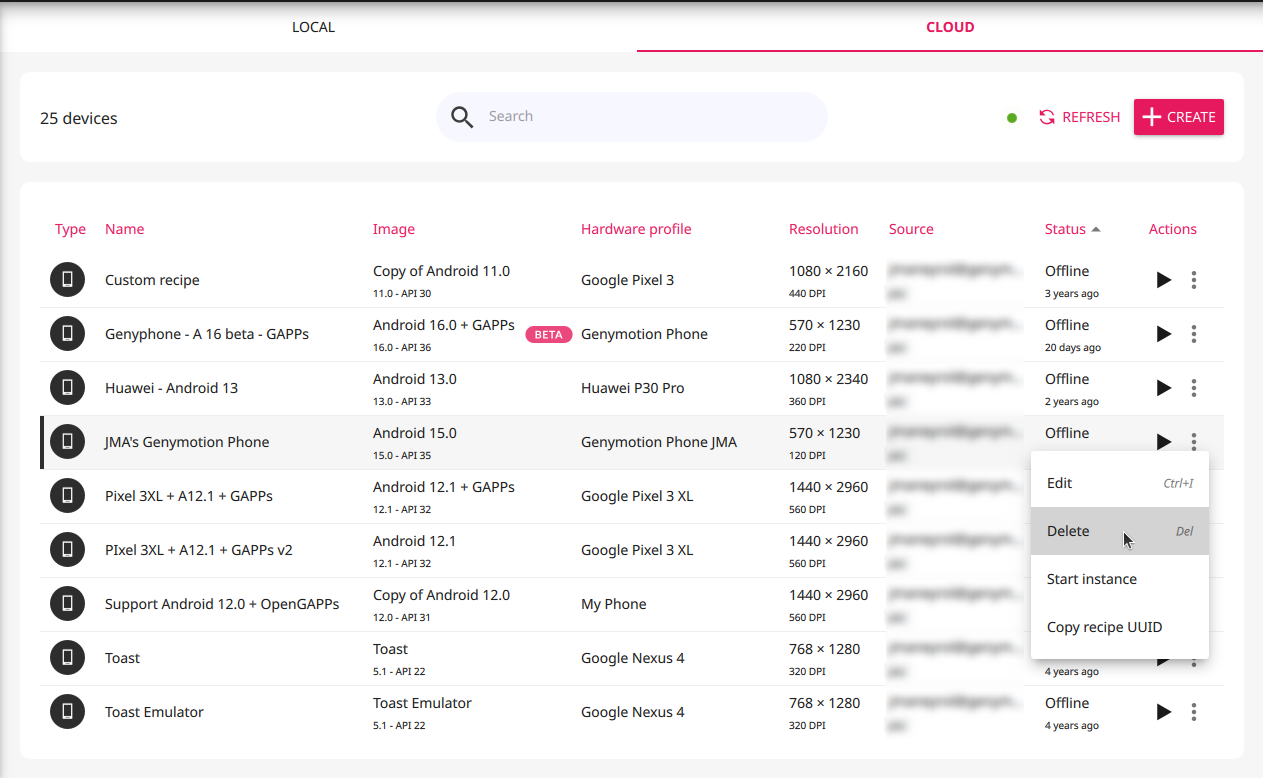
Deleting a cloud device will also delete the corresponding recipe in Genymotion SaaS
You will also be prompted to confirm the deletion of related resources, such as the hardware profile and Android image.
Copy recipe UUID
You can also copy the recipe UUID of a cloud device by clicking > "Copy recipe UUID" next to the device you wish to copy.
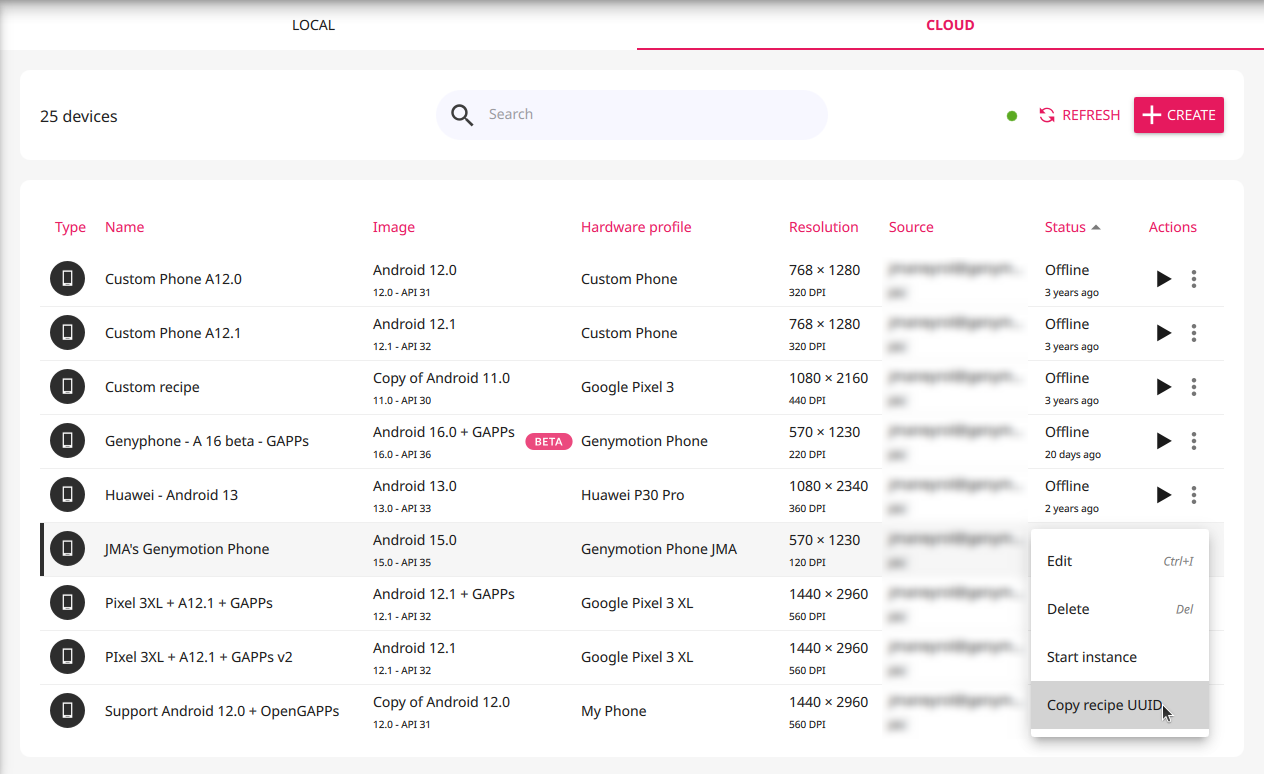
Recipe UUIDs are generally used to automate operations with gmsaas CLI tool.
Other options
More options are available when the cloud device is running, by clicking next to the running device you wish to manage:
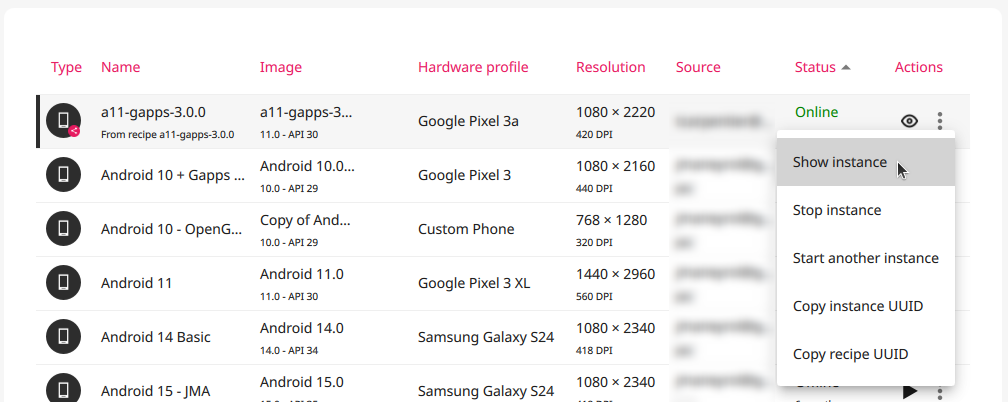
- Show instance: opens the device display in Genymotion Desktop.
- Stop instance: stops the running device.
- Start another instance: starts another instance of the same device (i.e. from the same recipe).
- Copy instance UUID: copies the instance UUID to the clipboard. Instance UUIDs are generally used to automate operations with gmsaas CLI tool.
- Copy recipe UUID: copies the recipe UUID to the clipboard. Recipe UUIDs are generally used to automate operations with gmsaas CLI tool.