Quickstart
In this section, you will find the steps to setup, launch, use and save a virtual device instance.
Start virtual devices
Closing your web browser or logging out will not stop your running virtual devices. They have to be stopped manually or they will keep running until the Frontend inactivity timeout or the maximum run duration are reached.
Warning
- By default, no timeout happens for virtual devices started with gmsaas. You must specify the
--stop-when-inactiveoption, or they will keep running until manually stopped. - Changes are not automatically saved - see save a virtual device.
Quick-start
From the Virtual devices dashboard, click  and search for the official or custom recipe you wish to use. A virtual device will be created and automatically launched with the selected recipe:
To see all the recipe properties, navigate to the Recipes page.
From a recipe
- Navigate to the Recipes page.
- Click on the recipe card you wish to use.
A new device with the selected recipe will be created and launched automatically, and you will be automatically redirected to the Virtual devices dashboard:
Access a virtual device display
From the Virtual devices dashboard, double click on the virtual device or hover the mouse over to it and click :
Stop a virtual device
Closing your web browser or logging out will not stop your running virtual devices. They have to be stopped manually or they will keep running until the Frontend inactivity timeout or the maximum run duration are reached.
To stop a running device, click Stop from the device display left bar menu:
You can also stop it from the Virtual devices dashboard; hover the mouse over to the desired virtual device and click :
If you are an organization manager, you can also stop a running virtual device even if you are not its owner. Select Message owner to notify the device owner.
Save a virtual device
Changes are not automatically saved. As a result, any modification to a virtual device has to be saved manually.
Save as a new custom recipe and custom image
If you started a virtual device from an official recipe, you can save it as a custom recipe and custom image:
- From the virtual device display, click Save in the left bar menu.
- Give a name to your custom recipe and custom image.
- Click CREATE.
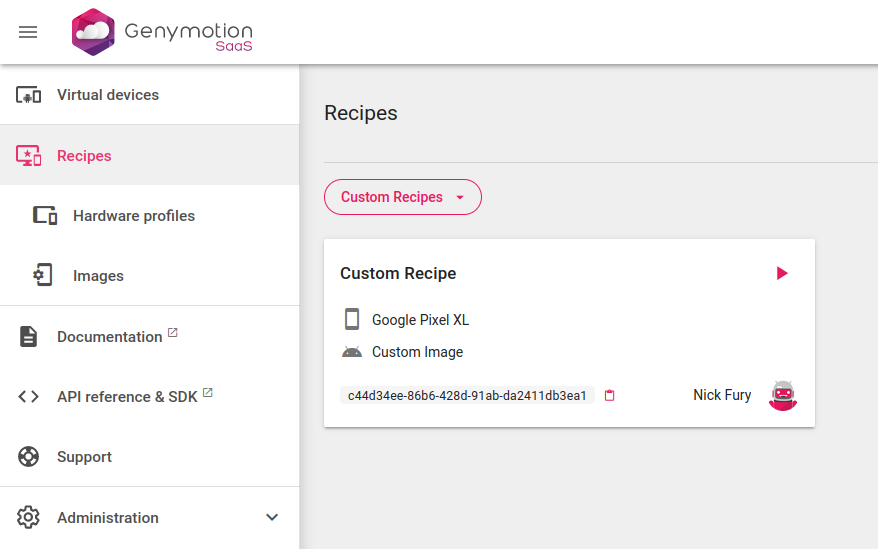
The newly created custom recipe can be found in the Recipes page:
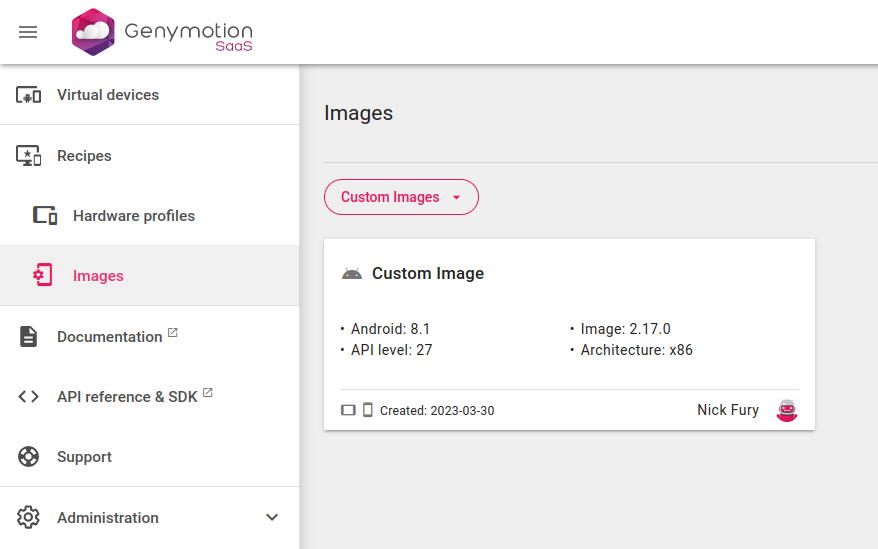
and the new custom image in Recipes > Images:
You can also do it from the Virtual devices dashboard:
- Hover the mouse over to the desired virtual device and click
- Name your new custom recipe and custom image click CREATE
This will stop the running virtual device and start the saving process. Your recipe will then appear as Saving until the process is complete - this may take a few minutes:
Once finished, your new custom recipe will appear in the the Recipes page, and the new custom image in Recipes > Images.
Update a custom recipe
To save changes of a virtual devices created from a custom recipe, click Save in the left bar menu. You can either save the changes to your current custom recipe, or create a new custom recipe:
You can also do it from the Virtual devices dashboard page:
- Hover the mouse over to the desired virtual device and click
- Select Update recipe to update the current custom recipe
Your recipe will appear as Saving until the update is complete. This can take a few minutes.
You can also select Create new recipe if you wish to create another custom recipe and custom image.