Root Access
Rooting allows Android mobile operating system users to reach privileged control (known as root access) over various Android subsystems. As Android uses the Linux kernel, rooting an Android device gives similar access to administrative (superuser) permissions as on Linux or any other Unix-like operating systems such as FreeBSD or macOS.
Un-Rooted images
Genymotion Desktop offers several unrooted Android images which can be rooted dynamically:
| Android version | Initial state | Dynamic root toggle |
|---|---|---|
| 16.0 | Unrooted | / |
| 15.0 | Unrooted | / |
| 14.0 | Unrooted | / |
| 13.0 | Unrooted | / |
| 12.1 | Unrooted | / |
| 12.0 | Unrooted | / |
| 11.0 | Rooted | |
| 10.0 | Rooted | |
| 9.0 | Rooted | |
| 8.1 | Rooted | |
| 8.0 | Rooted | |
| 7.0 | Rooted | |
| 6.0 | Rooted | |
| 5.1 | Rooted | |
| 5.0 | Rooted |
Our most recent Android images are not rooted by default, but they can be rooted dynamically:
| Android version | Initial state | Dynamic root toggle |
|---|---|---|
| 16.0 | Unrooted | / |
| 15.0 | Unrooted | / |
| 14.0 | Unrooted | / |
| 13.0 | Unrooted | / |
| 12.1 | Unrooted | / |
| 12.0 | Unrooted | / |
| 11.0 | Unrooted | / |
| 10.0 | Unrooted | / |
| 9.0 | Rooted |
x86/x86_64 images are deprecated and will be removed after March 30, 2026.
| Android version | Initial state | Dynamic root toggle |
|---|---|---|
| 14.0 | Unrooted | / |
| 13.0 | Rooted | |
| 12.1 | Rooted | |
| 12.0 | Rooted | |
| 11.0 | Rooted | |
| 10.0 | Rooted | |
| 9.0 | Rooted | |
| 8.1 | Rooted | |
| 8.0 | Rooted | |
| 7.0 | Rooted | |
| 6.0 | Rooted | |
| 5.1 | Rooted | |
| 5.0 | Rooted |
Some of our images are un-rooted images and can be dynamically rooted:
| Android version | Initial state | Dynamic root toggle |
|---|---|---|
| 16.0 | Unrooted | / |
| 15.0 | Unrooted | / |
| Automotive - 14.0 | Unrooted | / |
| 14.0 | Unrooted | / |
| 13.0 | Unrooted | / |
| 12.1 | Unrooted | / |
| 12.0 | Unrooted | / |
| 11.0 | Unrooted | / |
| 10.0 | Unrooted | / |
| 9.0 | Rooted | |
| 8.1 | Rooted | |
| 8.0 | Rooted | |
| 7.0 | Rooted | |
| 6.0 | Rooted | |
| 5.1 | Rooted |
Root and Un-root a device
This feature is not available on rooted Android images ( 11.0 and below).
Rooting and unrooting the device is controlled via the device property persist.sys.root_access which can be changed from the Advanced Developer Tools, when creating or editing a device from the launchpad:
When creating a device, check the "Root Access" option in the virtual device installation wizard:
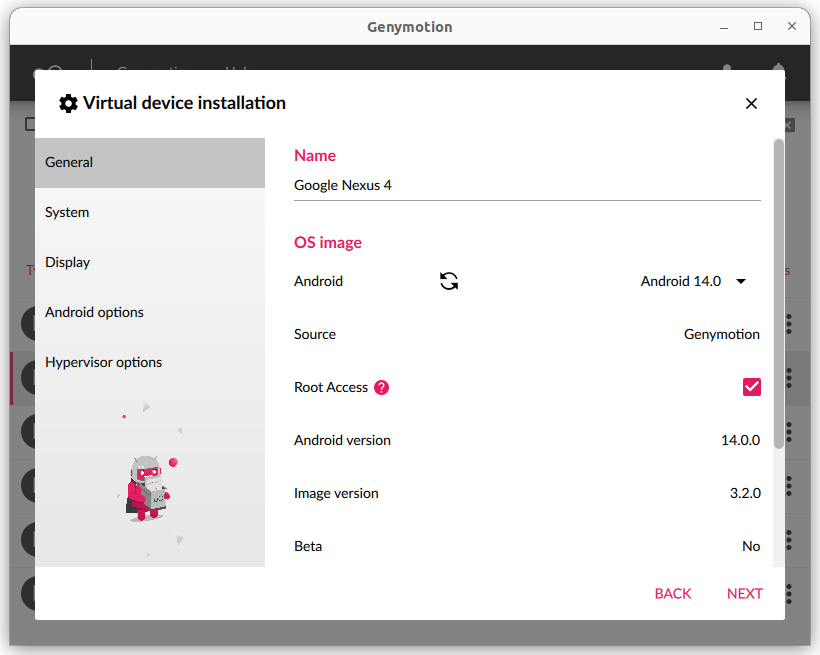
Then proceed to create the device. Root access will then be enabled by default.
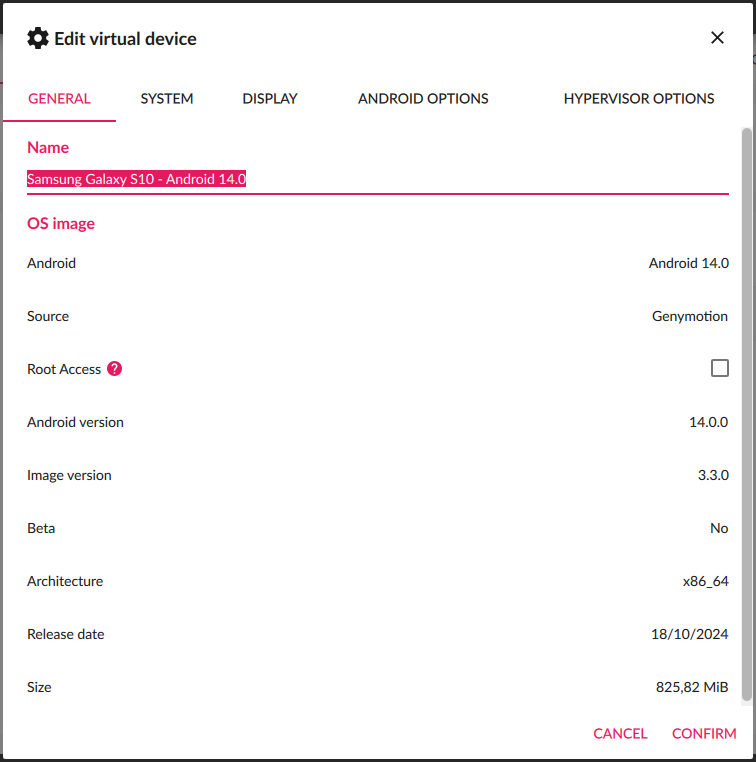
Edit a virtual device settings and go to the GENERAL tab. There, you can toggle Root access by checking the "Root Access" option:
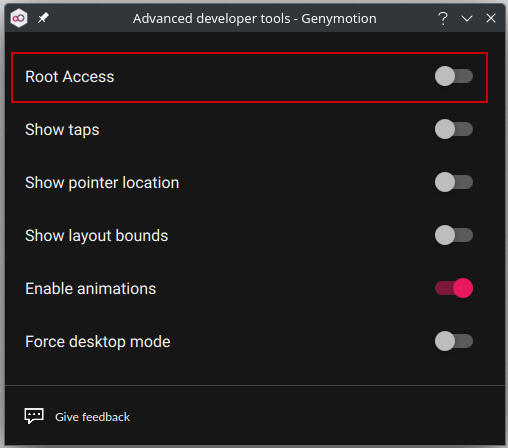
Open the Advanced Developer Tools Widget and toggle "Root Access":
Once the device is rooted, root access is available and can be granted to applications or obtained via the command line interfaces, as explained in the sections below.
Root toggling is controlled via the device property persist.sys.root_access which can be changed only by command line, with adb, for the moment.
To toggle root:
- Follow the instructions from Connect to ADB to connect your device to adb.
- Run the following ADB command:
adb shell setprop persist.sys.root_access 3
Once the device is rooted, root access is available and can be granted to applications or obtained via the command line interfaces, as explained in the sections below.
To disable root, run the ADB command:
adb shell setprop persist.sys.root_access 0
Root toggling is controlled via the device property persist.sys.root_access which can be changed either from the user interface, by command line or with the HTTP API.
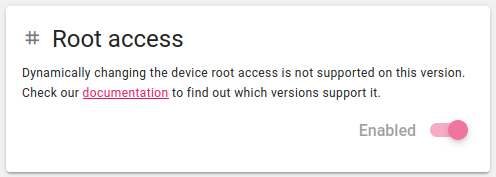
Navigate to the Configuration left-bar menu in the Web UI, and in the Root Access card, click to toggle root access:

Note
This feature is only available with Android 10.0 and above for the moment. With lower versions, the toggle switch will be disabled:
To root the device, set the persist.sys.root_access property value to "3" with the setprop command:
adb shell setprop persist.sys.root_access 3
setprop persist.sys.root_access 3
To revert back and unroot the device, set the property value to "0":
adb shell setprop persist.sys.root_access 0
setprop persist.sys.root_access 0
The current value of the property can be retrieved with the getprop command:
adb shell getprop persist.sys.root_access
getprop persist.sys.root_access
Device properties can be changed using the HTTP API endpoint /configuration/properties.
To root the device, set the persist.sys.root_access property value to "3" with the POST method.
Example
curl -u <username>:<password> -X 'POST' \
'https://34.247.73.220/api/v1/configuration/properties/persist.sys.root_access' \
-H 'accept: application/json' \
-H 'Content-Type: application/json' \
-d '{
"value": "3"
}'
To revert and unroot the device, set the property value to "0".
Example
curl -u <username>:<password> -X 'POST' \
'https://34.247.73.220/api/v1/configuration/properties/persist.sys.root_access' \
-H 'accept: application/json' \
-H 'Content-Type: application/json' \
-d '{
"value": "0"
}'
The current value of the property can be retrieved with the GET method.
Example
curl -u <username>:<password> -X 'GET' \
'https://34.247.73.220/api/v1/configuration/properties/persist.sys.root_access' \
-H 'accept: application/json'
Response:
{
    "key": "persist.sys.root_access",
    "value": "0"
}
Once the device is rooted, root access is granted and available for applications and from command line interfaces.
Root access for applications
If you are using a un-rooted device, Superuser will only be available once the device has been manually rooted.
Superuser is already installed on rooted virtual devices: when an application requests root access, it prompts a pop-up asking whether root access should be authorized or denied.
The default policy can be changed using the Superuser application.
Root access by command line (adb)
Connecting as a root user may damage your instance or jeopardize your data. USE AT YOUR OWN RISK!
Android 10.0 and above images are no longer rooted by default: root access is only accessible after the device has been manually rooted.
Android 9.0 and below images are always rooted: when logging with adb shell, you will already be logged as root.
Use the adb root command to switch directly to root:
adb root # Switch to root user
adb shell # Access the device shell
:/ #
Use adb unroot to switch back to standard user.
How to sign your system app
Android 10 images and above are user build types, whereas older versions are userdebug build types.
Android 10 and above images are signed with release keys: you can use the keys provided in this public repository to sign your system apps.
Other versions are signed with the default AOSP test keys.